
Reviewed and updated: October 14, 2026
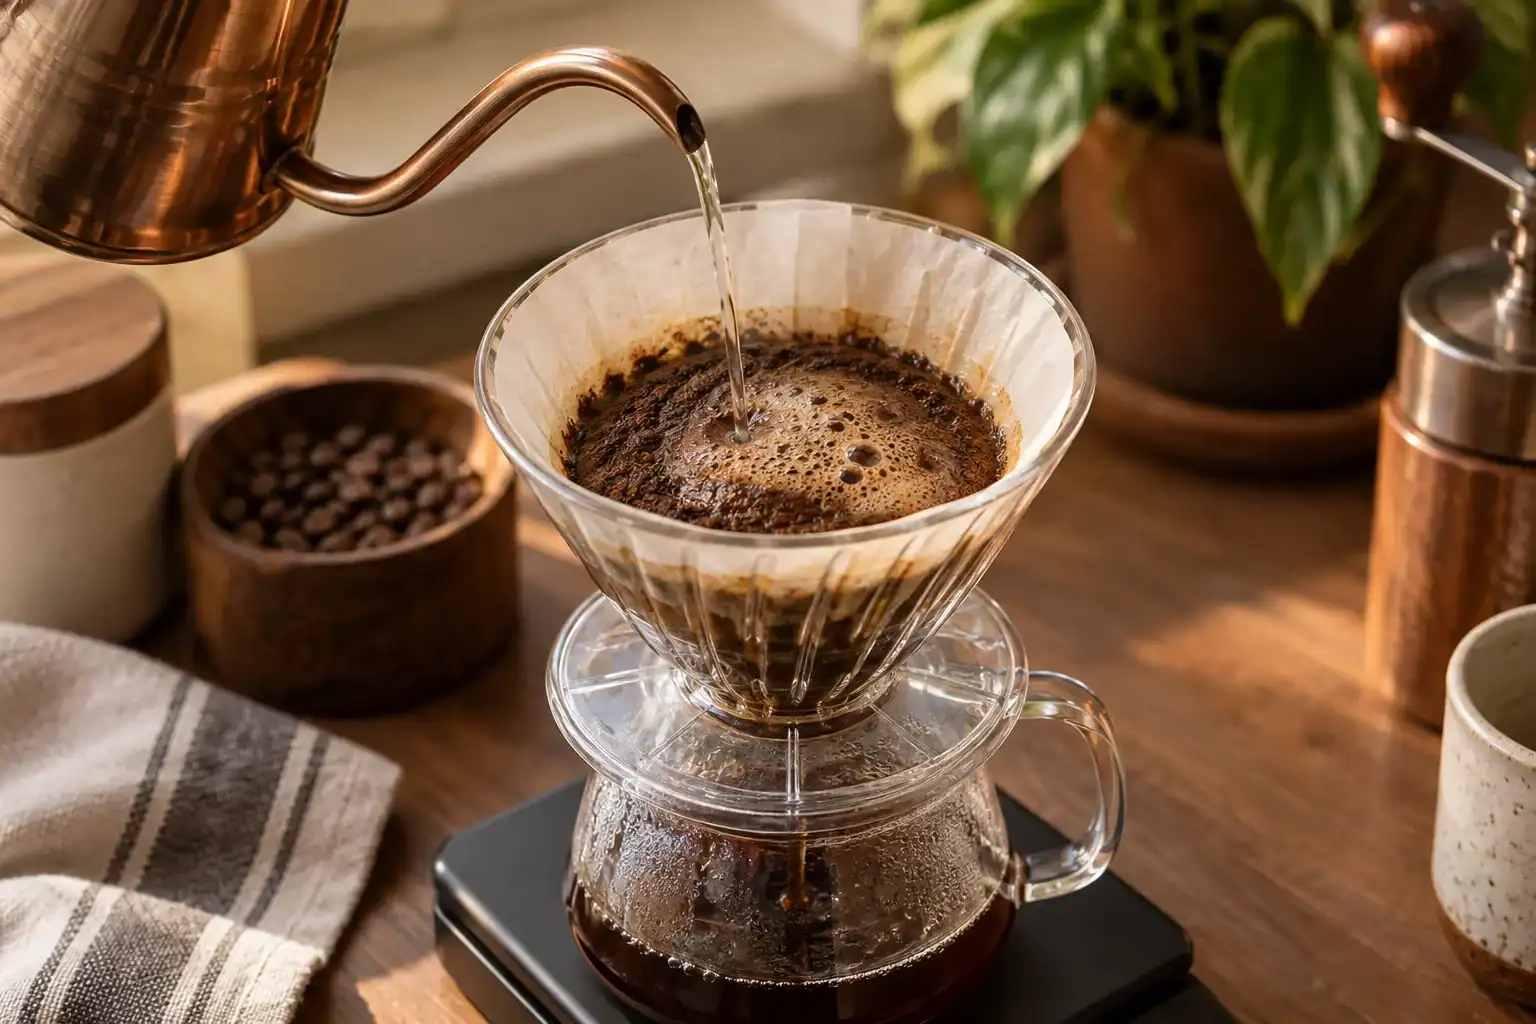
What the bloom is doing
Fresh roasted coffee releases carbon dioxide. When hot water first reaches the grounds, gas escapes and the bed may rise, bubble, or look foamy. A small preliminary pour gives water time to wet the grounds before the rest of the brew. That can reduce dry pockets and make later pours easier to control.
The bloom is a preparation stage, not a separate extraction trick that fixes every cup. Coffee age, roast, grind, water temperature, and pouring technique all affect how dramatic it looks. A quiet bloom does not automatically mean stale coffee, and a large one does not guarantee good flavor.
Set up an even coffee bed
Rinse the paper filter if the brewer and filter maker recommend it, discard the rinse water, and add freshly ground coffee. Gently level the bed so one side is not much deeper than the other. Place the brewer and cup on a scale if you want repeatable measurements.
Use a grind appropriate to the dripper and recipe. Our coffee grind size guide explains why a coarse or very fine bed changes flow. Keep the rest of the setup constant while learning the bloom so you are not chasing several variables at once.
Use enough water to wet every ground
A common starting point is roughly two to three times the coffee dose in bloom water, but the brewer and recipe should guide you. For 20 grams of coffee, that might mean about 40 to 60 grams of water. The exact number matters less than complete, controlled wetting without flooding the filter wall.
Pour near the center and move outward in a small spiral. Avoid sending most of the water straight down one spot. If dry islands remain, add a little water or use a gentle swirl. Aggressive stirring can damage a paper filter or move fines into places that slow the brew.
Start the timer with the first water
Timing from the first drop keeps the recipe clear. Many pour-over methods allow around 30 to 45 seconds for the bloom, while some coffees benefit from a little more or less. Follow the brewer maker's recipe first, then adjust based on wetting and taste.
Do not wait only for every bubble to disappear. Gas may continue to emerge after the main pour starts. Move on when the bed is evenly saturated and the planned bloom interval has passed.
Read the bloom without overinterpreting it
A domed, active bloom often appears with coffee roasted recently, because more gas remains. Dark roasts can release gas differently from dense light roasts. Grind freshness and the force of the pour also influence the show. Watch whether water reaches the whole bed and whether the slurry moves evenly.
If water immediately channels through one side, check that the bed was level and the pour centered. If the bloom sits like dry mud, the grind may be very fine, the coffee may be absorbing more water, or the pour may be too timid. Change one item in the next brew.

Swirl or stir with restraint
A gentle swirl can help water and coffee meet, especially in a flat-bottom brewer. Hold the brewer securely and make one small circular motion. With a cone brewer, a narrow spoon or stir stick can break a hidden dry pocket when the recipe allows it.
Too much agitation can lengthen drawdown by moving fine particles toward the filter. It can also make comparisons difficult because every swirl is different. Use the smallest action that solves an observable wetting problem.
Continue with a steady main pour
After the bloom, pour according to the recipe in pulses or one controlled stream. Keep the water level within the brewer's safe capacity and avoid pouring directly onto the paper above the coffee bed. A consistent kettle height and flow make the extraction easier to repeat.
Pour-over gives you direct control that an automatic drip brewer handles internally. Our pour-over versus drip comparison explains the workflow difference. Neither method is inherently superior; the useful choice is the one you can operate consistently.
Use taste to adjust bloom time
If the cup tastes thin or uneven and you saw obvious dry pockets, improve wetting before extending the bloom. If the grounds were saturated but the coffee tastes harsh and the total brew ran long, a longer bloom is unlikely to be the answer. Review grind, water, ratio, and pour structure.
Make small changes of five to ten seconds and record them. Taste the coffee after it cools a little. Heat can hide both sweetness and flaws, and one sip at serving temperature is not enough to judge the recipe.
Troubleshoot common bloom problems
No visible bubbling: verify roast date if available, but brew and taste before deciding the coffee is stale. Large dry clumps: increase initial water slightly or add one gentle swirl. Water drains instantly: check grind and filter fit. Bloom overflows: reduce dose or use a larger brewer rather than balancing liquid at the rim.
An uneven kettle stream makes all of these harder to diagnose. Practice pouring plain water into the empty dripper or a cup on a scale. Aim for a steady increase rather than exact perfection on the first try.
A repeatable bloom routine
Level the grounds, start the timer with the first pour, add enough water to saturate the coffee, use one gentle swirl only if needed, watch for dry areas, and begin the main pour at the recipe's target time. Record dose, bloom water, bloom time, grind, total water, and taste.
The bloom is useful because it creates a calm, observable start. It should support the whole recipe rather than become a contest for the biggest dome. Even wetting, a steady hand, and notes from the finished cup will teach you more than bubbles alone.
Compare brews with a simple test
Brew the same coffee twice with the same dose, grind, water, and pour pattern. In the first cup, use your normal bloom. In the second, change only the bloom time or water amount. Label the cups underneath, let them cool to a similar temperature, and taste side by side. This makes subtle differences easier to notice without relying on memory.
Record sweetness, acidity, bitterness, aroma, and finish rather than calling one cup simply stronger. If the result is indistinguishable, keep the easier method. If one cup is clearly more even, repeat the test another day before changing your permanent recipe. Coffee changes as the bag ages, so a bloom adjustment that helps during the first week may be unnecessary later. A small log turns the bloom from a ritual into a useful, testable part of brewing.